Document Viewer
Metadata Features
Metadata features are described by two element JSON arrays. JSON is a format for transmitting data between software applications.
Note
Metadata feature descriptions have an indirect relationship to the field names of the original metadata fields in the source dataset. Brainspace strongly encourages using an exported portable model file as a starting point when creating a new portable model file that will use metadata features. Begin by using CMML to train a portable model from some examples on the source dataset (or one with the same metadata structure and import configuration), and then export the model. You can then modify the feature descriptions in that exported file to produce documents that will be useful for your classification task.
Below are some example feature descriptions for metadata match features:
“[“”cc””,””fred jimes <jimes@foo.org (jimes@foo.org)>””]”
“[“”created””,””20011204″”]”
“[“”emailclient””,””outlook””]”
“[“”sent-hour-of-day””,””12″”]”
“[“”received-day-of-week””,””thursday””]”
“[“”created-year-month-day-hour””,””2001120412″”]”
The first element of the description specifies the field name of a metadata field. Because of mapping and feature extraction operations, the field names in metadata features are not necessarily the same as the field names in the source data.
In the examples above, the field names are:
cc
created
emailclient
sent-hour-of-day
received-day-of-week
created-year-month-day-hour.
The second element is the field value to be matched. The metadata feature will contribute to the score of a document when the field value matches the contents of the specified field for the document.
In the examples above, the field values are:
“fred jimes <jimes@foo.org (jimes@foo.org)>”
“20011204”
“outlook”
“12”
“thursday”
“2001120412”
The process of determining whether a field value matches the contents of the corresponding field depends on the nature of the particular field.
Two factors play into this:
The values for some metadata fields (e.g., emailclient) correspond directly to raw values in the source field in the original data. Other metadata fields have values that are the output of some computation. For example, received-day-of-week has a value that is derived mathematically from the date.
Some metadata fields always take on a single value, (which might be missing) for a document (e.g., emailclient above), while others (e.g., cc) can take on zero, one, or several values.
Document Viewer Features
After doing a search for documents in Analytics, you can view each document and its metadata in the Document Viewer. The Document Viewer includes the following features:
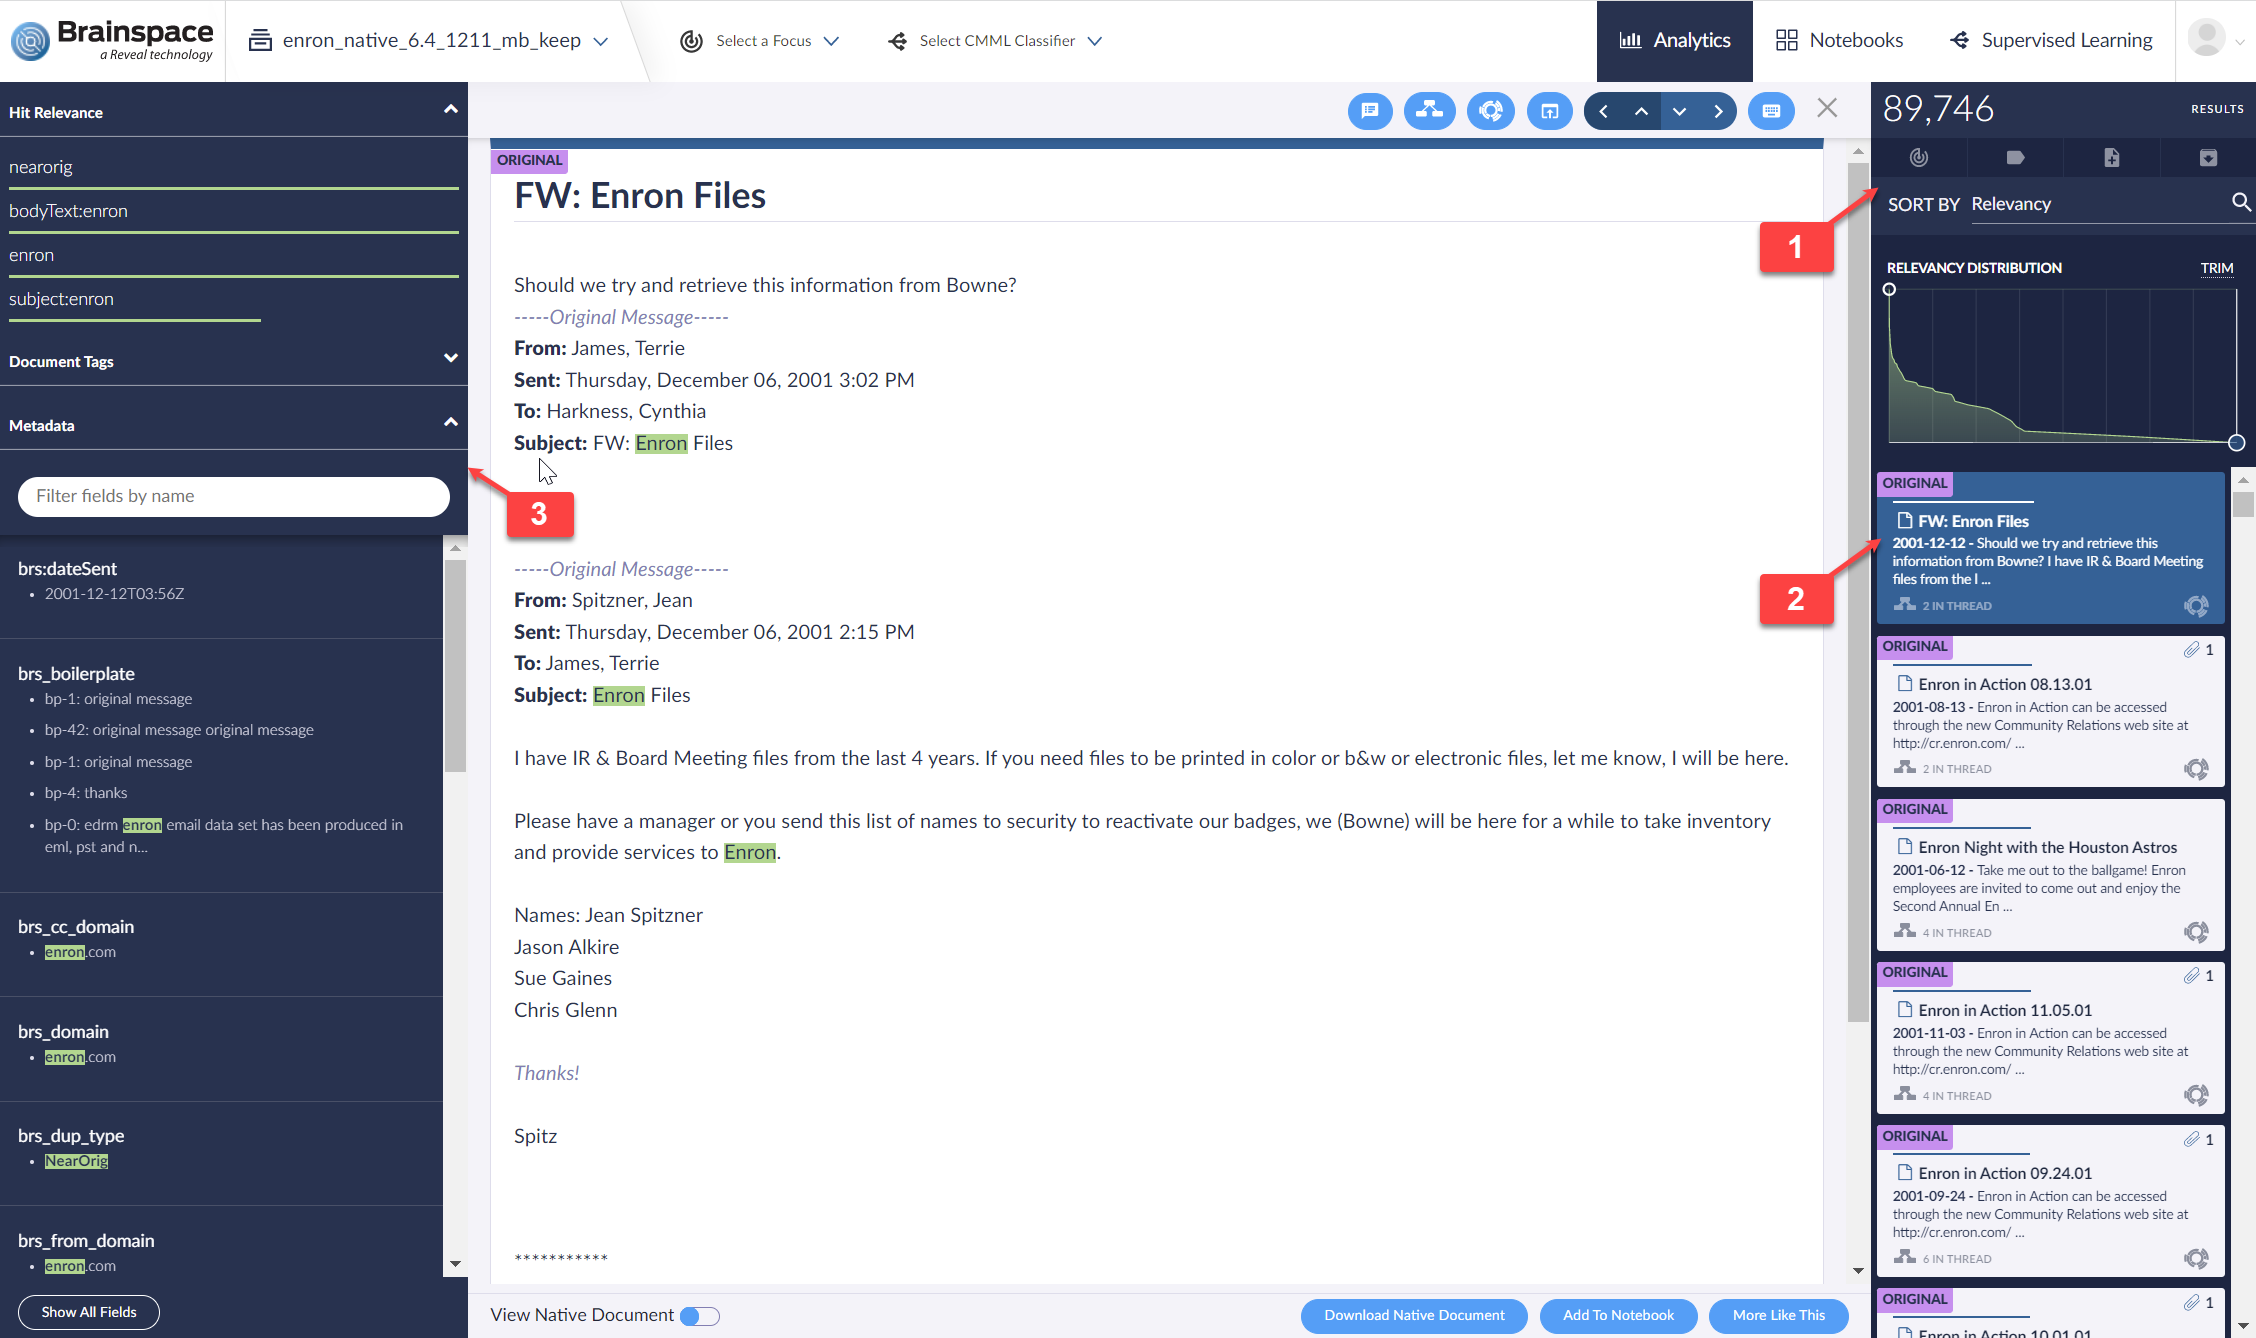
View the Results Pane, which includes
A count of documents retrieved as result of the search.
Buttons for Focus, Tag Results, Add to Notebook and Download Search Results Report.
Sort by selectable metadata criteria (default is Relevancy).
Relevancy Distribution graph for the search result set, which may be trimmed to filter for higher relevancy.
Document cards labeled for status: Original, Near Duplicate or Exact Duplicate and, where specifically retrieved, Not Analyzed.
Clicking a Document Card will open a specific document in the Document Viewer.
View the Hit Relevance pane to display a document’s metadata and manage tags.
Hit Relevance Pane (Metadata)
When reviewing documents in the Document Viewer, you can view metadata and view and manage tags associated with a document. The Metadata tab includes the following features:
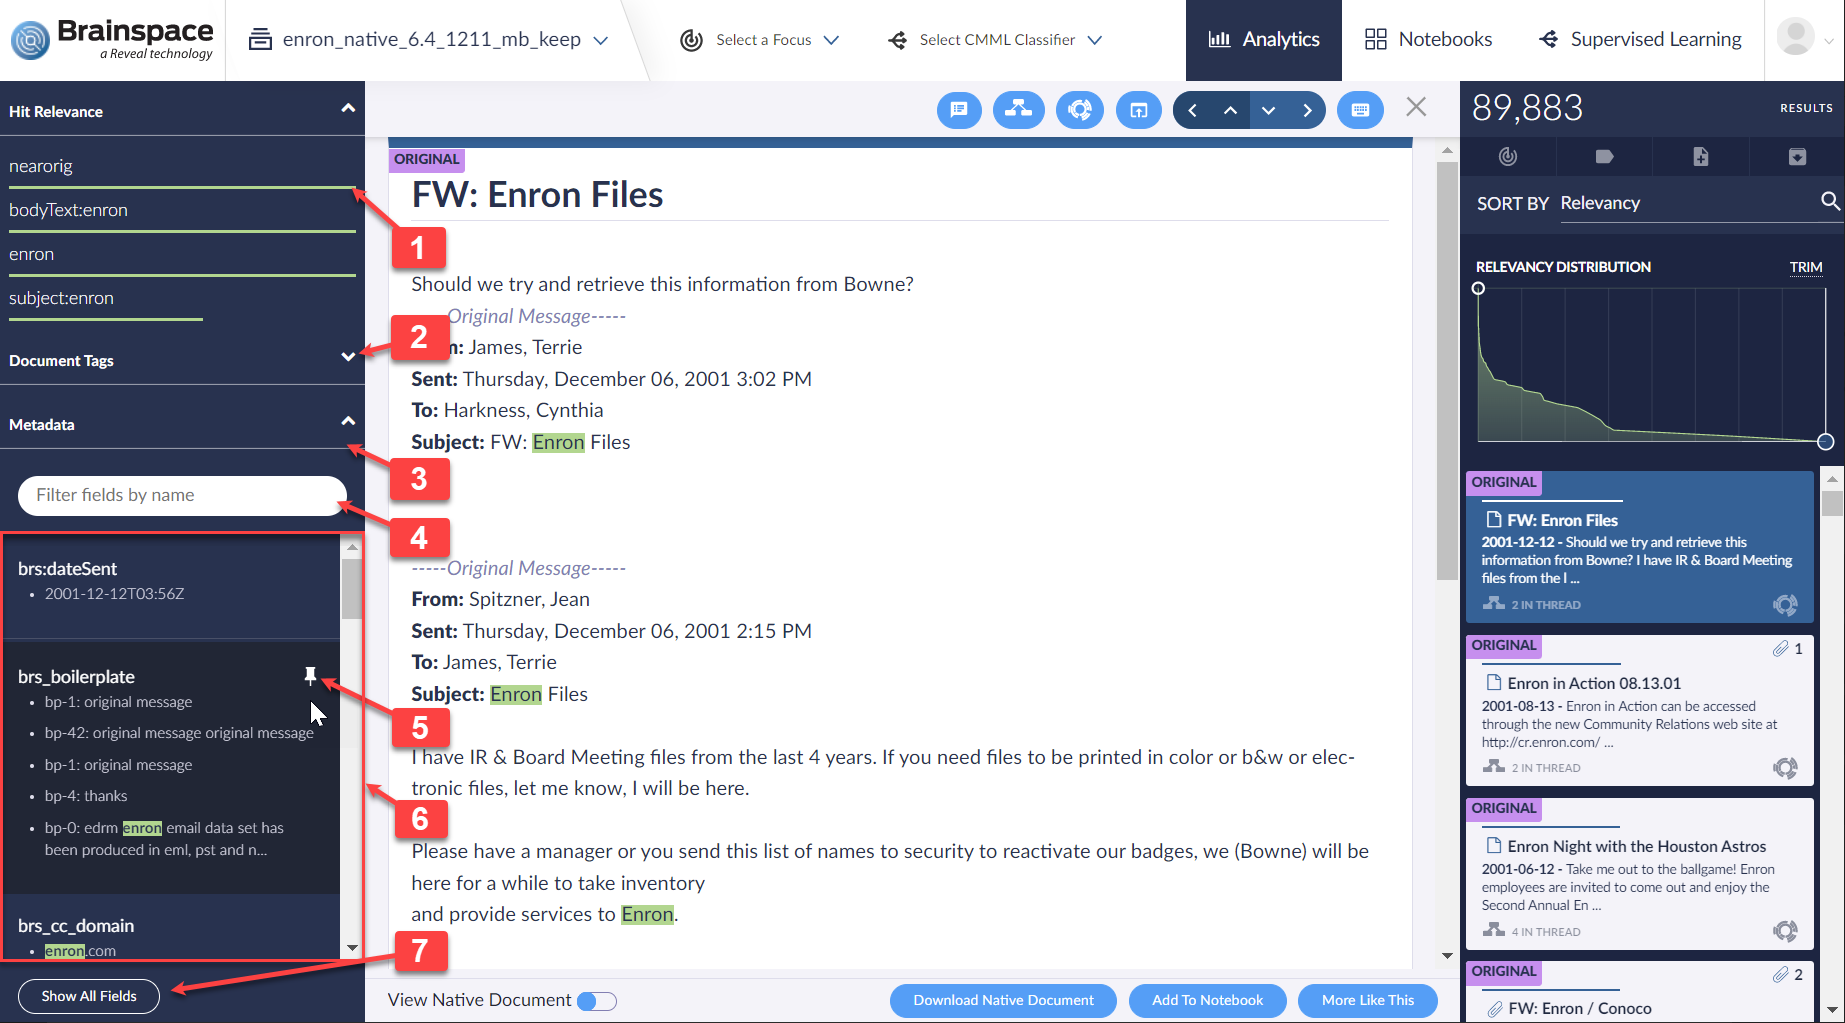
View the search elements that are true for the selected document. In this example, the user searched for near-duplicate documents, and the example document was included in the search results because it is a near-original (pivot of the near-duplicate set) document.
View and manage document tags.
View document metadata.
Filter to find specific fields associated with the document.
Pin (or unpin) metadata fields. Fields will remain pinned from session to session even after you log out of Brainspace. After pinning the field, you can pin additional fields, show only pinned fields in the metadata fields list, or continue reviewing documents.

View metadata fields associated with the document.
Toggle display of all metadata fields between Show All Fields and Show Less
Note
If you have pinned metadata fields, the pinned fields will display at the top of the Fields pane followed by unpinned metadata fields when Show All Fields is toggled.
Hit Relevance Pane (Document Tags)
When reviewing documents in the Document Viewer, you can view and manage tags associated with a document. The Tags tab includes the following features:
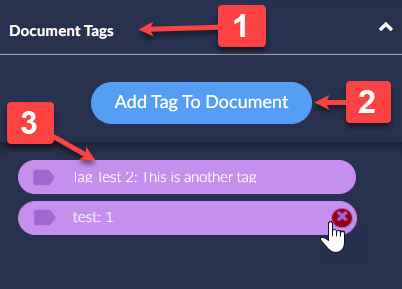 |
View and manage document tags.
Add an existing tag to the document.
View and delete tags associated with the document.
Focus
To include a specific subset of documents in a dataset when training a CMML classifier, you can create a focus and then use it as a training round. All training examples must come from this subset of documents. Predictive ranks will only be applied to documents from the same subset of documents.

For example, a dataset called English Wikipedia contains 4.3 million documents, but only 21,000 of those documents are related to the concept “Apollo.” Given that the rest of the documents in the dataset are unrelated to Apollo, there is no need to consider them for training or assign predictive ranks to them. When using a focus with the Relativity® integration, scores for the 21,000 documents will be overlaid in Relativity® each time the model is updated instead of the entire corpus of 4.3 million documents.
See Create a Focus below for further details.
Sort Documents by Metadata Fields
After creating a search, the documents will display in the Results pane sorted by relevance to the search terms. You can also choose to sort documents by specific metadata fields.
To sort documents by specific metadata fields:
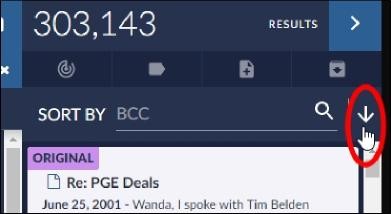
With a search active and the Results pane visible, hover over the SORT BY Relevancy field, and then click a metadata field:
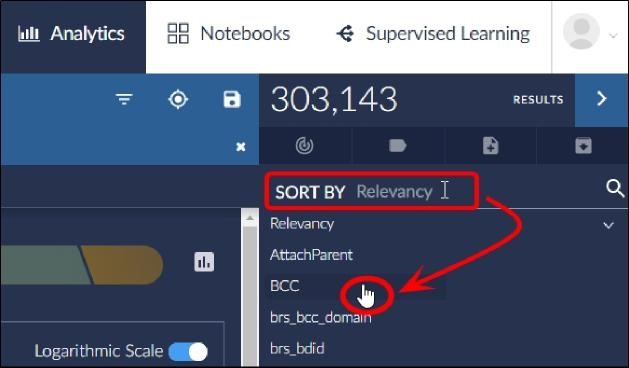
The Results pane will refresh to display the highest ranking document for the specified metadata field at the top of the document card list and the lowest scoring document at the bottom of the card list. You can click the Sort arrow to view the results in ascending order:
After sorting document cards by a metadata field, you can use the results to create a focus or a notebook. You can also tag the documents and download a report for the results.
Create a Focus
After searching for documents in a dataset, you can create a focus from the search results to use when creating a CMML classifier.
Open a dataset in the Analytics Dashboard.
Search for documents.
The Document Viewer will open.
Click the Focus icon:

The Manage Focus dialog will open.
In the Name text field, type a name for the focus.
Click the Private/Public switch to make the focus public.
Note
If you choose to make the focus public, you will not be able to make it private in the future.
Click the Threads, Families, Related Documents, or Exact Duplicates check boxes to include additional documents in the focus.
Click the Save Focus button.
The Manage Focus dialog will close.
After creating a focus, you can use it to create a CMML classifier.
Manage a Focus
After creating a focus, you make a private focus public and delete a focus.
To manage a focus:
Open a dataset in the Analytics Dashboard.
Click the Select a Focus dropdown menu, and then click the Edit Focus icon :
The Manage Focus dialog will open.
Edit the settings and then click Save Focus, or click the Delete icon.
Manage Documents in a Focus
After creating a focus, you can open the focus in the Analytics Dashboard to view its documents, tag documents.
To manage documents in a focus:
Open a dataset in the Analytics Dashboard.
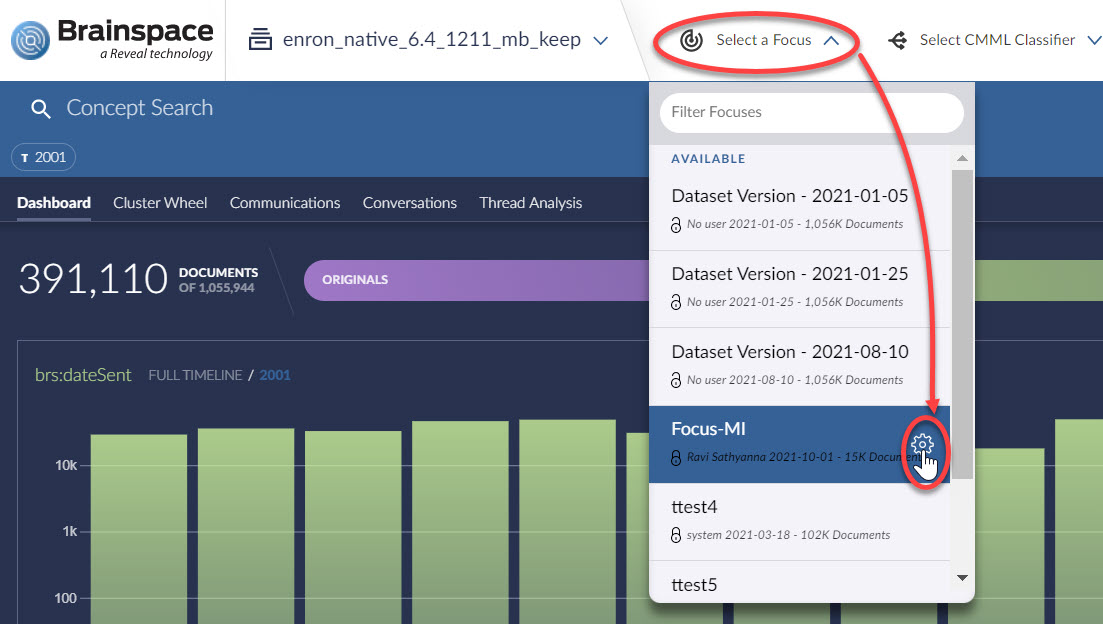
Click the Select a Focus dropdown menu, and then click the Focus entry in the list:

The focus will open in the Analytics Dashboard, and the Select a Focus dropdown menu will display the name of the focus.
All further searches with this focus active will be constrained to the documents in this focus.
Rolling Additions to Focus
Brainspace Version 6.7 adds the ability to add further documents to an existing focus. A tab has been added to Add a Focus that permits a search or selection to be either collected in a new focus or added to a focus already created.
 |
In the above illustration, the LASTMODIFIEDTIME selection of 2013 has been retrieved. Add to Focus will be opened to specify a focus to which the results (3,541 documents) will be added.
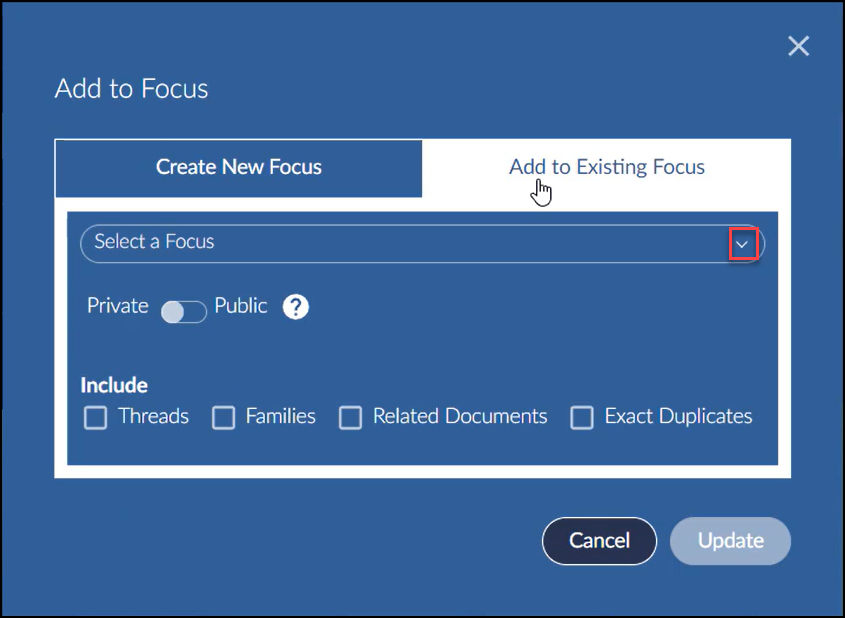 |
In the Add to Focus pop-up, you may Create New Focus or select the Add to Existing Focus tab. Click the drop-down arrow to Select a Focus.
 |
The selected focus will display the user who created it, the date of creation and the present number of documents contained in the focus (158 in this example). Click Update to merge the additional documents into the selected focus.
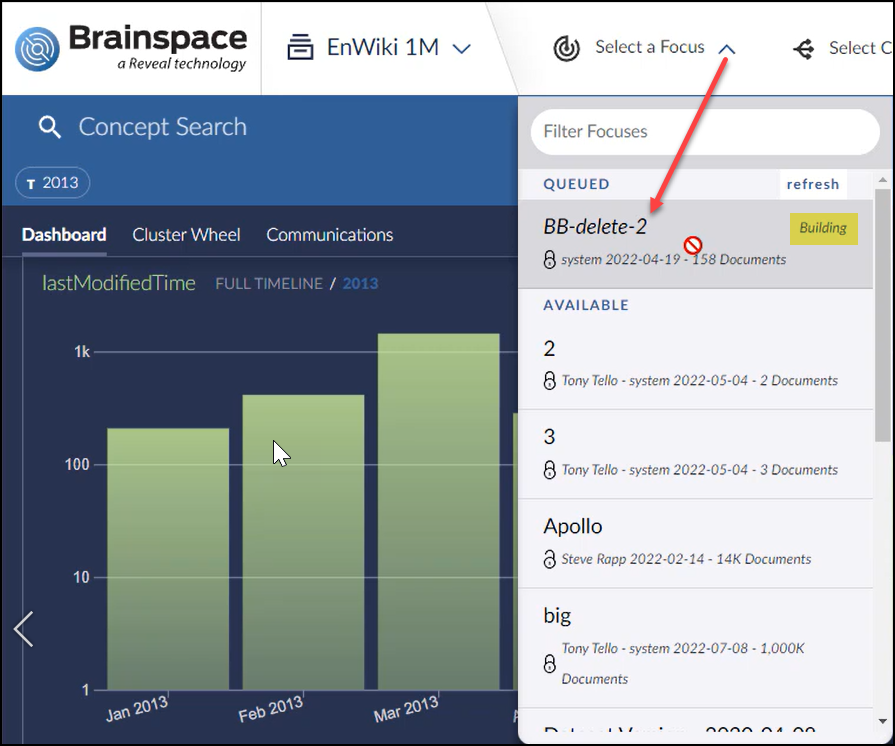 |
The selected focus will be unavailable for use while building the combined focus. When complete, the combined focus may be applied to any CMML session. If the addition to the focus should fail for any reason, the original focus will be restored.